Achieving crystal-clear epoxy resin results requires precise techniques, the right tools, and attention to detail. Whether you're creating art, jewelry, or functional items, proper mixing ensures your resin cures smoothly without bubbles, cloudiness, or imperfections. Follow this step-by-step guide for flawless results.
-
Choose the Right Epoxy Resin
Selecting a high-quality resin is crucial for crystal-clear outcomes. Look for a resin that offers:
- UV resistance to prevent yellowing.
- Long working time for intricate projects.
- Low viscosity for easier bubble release.
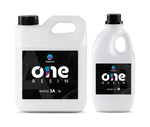
👉 Try One Resin, a premium epoxy resin designed for durability, clarity, and professional-grade results.
-
Gather Your Materials
Before starting, ensure you have the following:
- Resin and hardener
- Measuring cups
- Stir sticks or silicone mixing tools
- Gloves and safety gear
- Heat gun or torch for bubble removal
-
Work in the Right Environment
The environment plays a significant role in the mixing and curing process:
- Temperature: Maintain a room temperature of 20-25°C (68-77°F) for optimal curing.
- Cleanliness: Work in a dust-free space to avoid debris settling on your resin.
- Flat Surface: Ensure your workspace is level for even curing.
-
Measure Precisely
Accurate measurement is critical for resin and hardener to cure properly:
- Use separate measuring cups for resin and hardener.
- Follow the manufacturer’s mixing ratio (e.g., 3:1 for One Resin).
- Avoid estimating or eyeballing measurements.
-
Mix Thoroughly and Slowly
Proper mixing prevents bubbles and ensures even curing:
- Combine the resin and hardener in a single mixing cup.
- Stir slowly and scrape the sides and bottom of the container.
- Continue mixing for 2-3 minutes until the mixture is uniform. A cloudy appearance indicates incomplete mixing.
-
Minimize Air Bubbles
Air bubbles can disrupt the clarity of your project. Reduce bubbles by:
- Stirring slowly to avoid introducing air.
- Using a heat gun or torch to pop surface bubbles after pouring.
- Allowing the mixed resin to rest for a few minutes to let trapped bubbles rise.
- Tips for Crystal Clear Results
- Warm the Resin: Slightly warming the resin before mixing lowers its viscosity, making bubble removal easier.
- Avoid Overmixing: Excessive stirring can introduce additional bubbles.
- Use Proper Tools: Silicone or plastic stir sticks prevent micro-scratches that could create bubbles.
- Pour and Cure Carefully
- Pour the mixed resin into your mold or project slowly to prevent air pockets.
- Cover the project while curing to protect it from dust.
- Allow the resin to cure for the recommended time (24-48 hours) in a controlled environment.
- Troubleshooting Common Issues
- Sticky Resin: Results from incorrect ratios or insufficient mixing.
- Cloudiness: Often caused by moisture contamination or uneven mixing.
- Bubbles: Use a heat gun or a vacuum chamber for effective removal.
Mixing epoxy resin correctly is an essential skill for any resin artist or DIY enthusiast. With patience and the right technique, you can achieve a flawless, crystal-clear finish every time.
For guaranteed results, use One Resin—a trusted solution for clarity and professional-grade quality in epoxy resin projects. Start your next masterpiece today!


