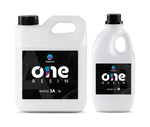
Customising Your Home with Epoxy Resin and Grey Night Marble: From Concept to Completion
Introduction:
Gray Night Marble and epoxy resin can transform your residence into a luxurious resort. These materials are perfect for renovating your living room, kitchen or bathroom because they offer a unique combination of durability and improvement. This easy-to-follow instruction will help you realise your idea from beginning to finish, a polished masterpiece.
- Dream It: Visualise Your Ideal Space
- Select Your Objective: Identify what you want to enhance.
- Choose a Style: Make sure the design fulfils your taste.
- Pick Your Colours: Check that Grey Night Marble works nicely with your colour choice.
- Prepare It: Putting Ideas into Action
- Sketch Your Design: sum up your concept.
- Test Particularly: Get accurate measurements.
- Make a budget: control your expenditures.
- Choose The highest-quality Materials
- Epoxy Resin: Select a clear, durable option.
- Grey Night Marble: ensure that the layout remains stable.
- Keep Your Canvas Easy
- Surface Setting up: Wash and scrub the entire area.
- Safety note: Wear a face mask, gloves, and goggles.
- Generate Magic
- Mix Resin: Follow the resin mixing instructions.
- Drop and Spread: Carefully apply the epoxy resin.
- Planning Goal: Discover the illusion of marble.
- Cure Duration: Allow a full day or two days to dry.
- Finish The specifics
- Wash and polish: Keep the surface smooth and shiny.
- Cover: Set on a barrier of resistance.
- Install: Install your parts carefully.
- Interest and joy
- Discover Your Procedures: Enjoy your newly created area.
- Enjoy the Elegance: Relish your home's new look.
Conclusion
It's straightforward and rewarding to modify via Grey Night Marble and epoxy adhesive. Create elegant, durable areas that represent your style via these steps.


