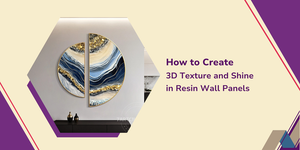
Plain walls are a thing of the past. In today’s interior design world, 3D resin wall panels are a bold way to combine depth, color, and high-gloss finish to transform any space. Whether you're designing a statement wall for a living room, office, or gallery, the right epoxy resin technique and product selection can create mesmerizing texture, shine, and luxury.
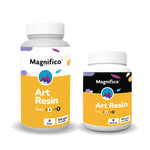
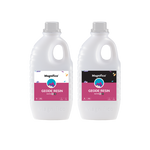
In this guide, we’ll show you how to create 3D texture and glass-like shine using Magnifico Geode Resin, a premium formula specifically designed for resin wall art and textured panels.
Why Use Magnifico Geode Resin for Wall Art?
Magnifico Geode Resin is specially engineered for large-scale, artistic applications like wall installations and vertical art surfaces. It’s ideal for:
- Building layered textures
- Creating glossy, reflective finishes
- Embedding stones, glitters, pigments & glass
- Pouring in multiple dimensions
- Long-lasting, non-yellowing results
Before starting, gather these essentials:
- Magnifico Geode Resin (or Magnifico ONE Resin for topcoat)
- MDF or plywood board (primed and sealed)
- Silicone molds or stencils for raised texture
- Crushed glass, stones, metallic pigments
- Heat gun or torch
- Measuring cups, gloves, mask, and mixing tools
Step 1: Prepare Your Surface
Use a sealed and primed MDF board. Make sure it's level and free of dust. You can pre-sketch your design with a pencil if needed.
Step 2: Build the 3D Texture Layer
Use materials like modeling paste, silicone molds, crushed quartz, or stones to create physical height and structure. You can glue these to your surface before pouring resin.
Apply a thin layer of Magnifico Geode Resin as a base to hold textured elements in place.
Step 3: Pour Resin in Layers
Mix your Geode Resin in a 1:1 ratio, stir slowly to avoid bubbles. Add metallics for dynamic effects.
Pour in multiple controlled layers to build depth and light refraction—this is where the “3D” magic happens.
Step 4: Use a Heat Gun for Movement & Shine
Once poured, use a heat gun to move colors and eliminate air bubbles. This creates stunning lacing and ripple effects seen in high-end geode resin wall art.
Step 5: Final Gloss Coat
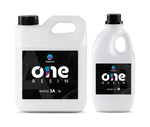
After your 3D design cures (24–36 hrs), apply a final clear topcoat of Magnifico ONE Resin for a high-gloss, mirror-like finish.
This step enhances shine, protects pigments, and locks in embedded materials.
Design Ideas for 3D Resin Wall Panels
- Geode Crystals & Stones (rose quartz, citrine, amethyst)
- Ocean Wave Panels with blue tones and sandy textures
- Abstract Metallics with gold, copper, and black accents
- Epoxy Resin Mandala Wall Art with glitter and mirror finishes
- Developed for vertical applications and installations
- Longer working time = more creative control
- Compatible with stones, glitters, mirrors, and inks
- Manufactured in India for cost-effective bulk use
- Trusted by interior designers and wall art studios
Creating 3D textured resin panels is more than a DIY project—it’s a modern artform. With the right materials like Magnifico Geode Resin, you can produce gallery-level installations that capture depth, reflection, and energy.
Whether you're a professional interior designer or resin art enthusiast, this technique offers unlimited possibilities for custom, luxurious wall décor.


